虚拟开发环境-Vagrant
介绍vagrant,为公司搭建统一的开发环境。最终会输出一个统一的虚拟开发环境,然后就可以分发给团队中所有的开发人员,大家在一致的开发环境中编辑,验证代码……
从此,告别“在我的机子上运行没问题的……”这个看似很有道理的扯皮了。
官网网址:https://www.vagrantup.com/
vagrant安装
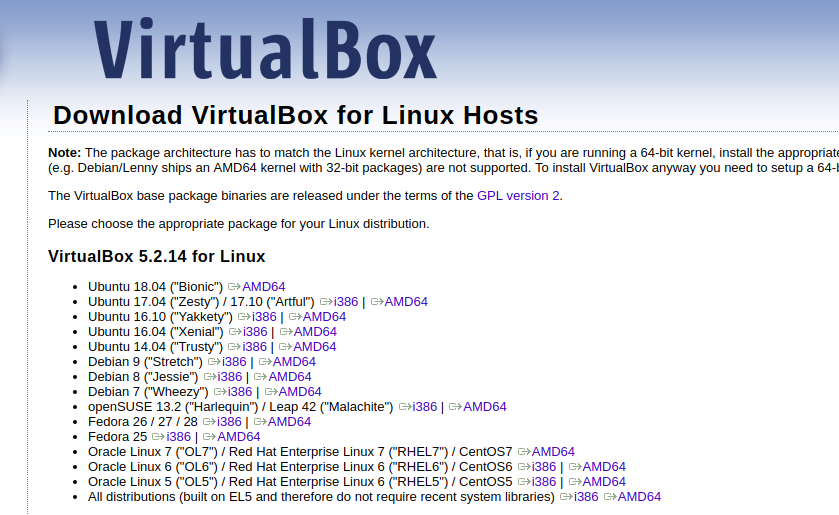
安装开源虚拟机VirtualBox
注意安装版本和vagrant版本要对应,否则后面会出现各种问题。这里安装最新版本。
下载地址:https://www.virtualbox.org/wiki/Downloads
选择自己电脑系统对应版本。
axel -n 10 https://download.virtualbox.org/virtualbox/5.2.14/virtualbox-5.2_5.2.14-123301~Ubuntu~xenial_amd64.deb
然后,执行安装命令sudo dpkg -i *.deb进行安装即可。
安装过程中可能会缺少依赖包,把依赖包安装即可:
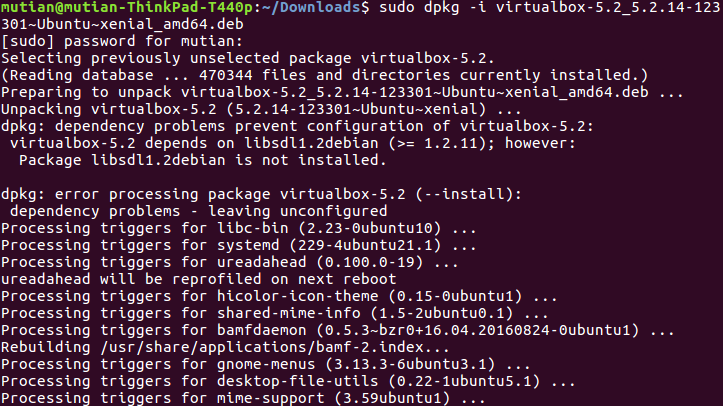
安装依赖包:mutian@mutian-ThinkPad-T440p:~/Downloads$ sudo apt install libsdl1.2debian
重新执行安装命令:
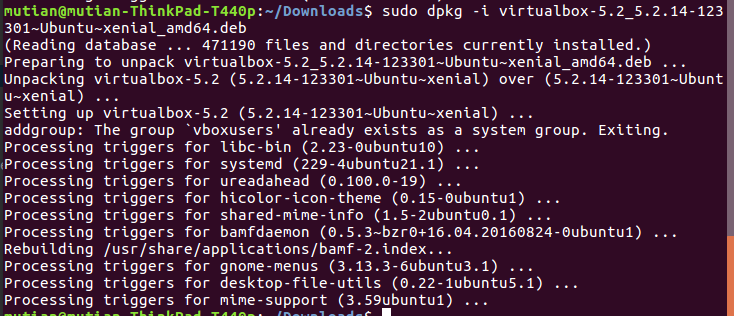
安装没有任何错误。 已安装到系统。
windows下安装问题:
安装Virtualbox的时候回滚,并提示发生一个严重的错误。
解决方法如下:

打开服务选项  :win + R  然后在跳出来的编辑框 键入  services.msc   然后回车

1.Device Install Service

2.Device Setup Manager

开启这两个服务,然后右键安装程序,以管理员身份运行,然后就能安装啦~
安装vagrant
安装最新版本。
下载地址:https://www.vagrantup.com/downloads.html
下载自己电脑系统对应版本。
axel -n 10 https://releases.hashicorp.com/vagrant/2.1.2/vagrant_2.1.2_x86_64.deb
然后,执行安装命令sudo dpkg -i vagrant_2.1.2_x86_64.deb进行安装即可。
查看安装是否成功:
mutian@mutian-ThinkPad-T440p:~/Downloads$ vagrant -v
Vagrant 2.1.2
表明安装已经成功,版本2.1.2。
添加Box
官方box源:https://app.vagrantup.com/boxes/search
网络不好,需要翻墙。或者通过其它途径下载想要的box。
- 查看所有已下载box
vagrant box list
- 添加box
vagrant box add centos/7
执行上面命令会添加相应box到vagrant系统,如果没有,会先从box官源下载。
- 再次执行
vagrant box list便可以看到。
离线方式:
https://cloud.centos.org/centos/7/vagrant/x86_64/images/
下载相应box镜像,然后执行命令添加box:
vagrant box add centos/7 aa.box
创造自己box
- 创建目录
mutian@mutian-ThinkPad-T440p:~/dev/vagrant$ mkdir xcsqjr-dev/
- 初始化,创建配置文件
mutian@mutian-ThinkPad-T440p:~/dev/vagrant$ cd xcsqjr-dev/
mutian@mutian-ThinkPad-T440p:~/dev/vagrant/xcsqjr-dev$ vagrant init centos/7
A `Vagrantfile` has been placed in this directory. You are now
ready to `vagrant up` your first virtual environment! Please read
the comments in the Vagrantfile as well as documentation on
`vagrantup.com` for more information on using Vagrant.
会在当前目录下创建文件Vagrantfile。然后就可以编辑该文件,做一些配置:
# -*- mode: ruby -*-
# vi: set ft=ruby :

# All Vagrant configuration is done below. The "2" in Vagrant.configure
# configures the configuration version (we support older styles for
# backwards compatibility). Please don't change it unless you know what
# you're doing.
Vagrant.configure("2") do |config|
  # The most common configuration options are documented and commented below.
  # For a complete reference, please see the online documentation at
  # https://docs.vagrantup.com.

  # Every Vagrant development environment requires a box. You can search for
  # boxes at https://vagrantcloud.com/search.

  # ----------- 一些相关配置 start ----------------#
  config.vm.box = "centos/7" #和已经下载的box名字一致
  config.vm.hostname = "ymu"
  #config.vm.box_version = "1.1.0"
  config.vm.box_url = "http://ymu.box"

  # 对虚拟机的一些配置
  config.vm.provider "virtualbox" do |vb|
  #   # Display the VirtualBox GUI when booting the machine
  #   vb.gui = true
  #
  #   # Customize the amount of memory on the VM:
      vb.memory = "1024" #为虚拟机分配内存
      vb.cpus = 2 #为虚拟机分配cup,分2核心
      vb.name = "centos7_ymu" #虚拟机名称
  end

  # ----------- 一些相关配置 end ----------------#

  # Disable automatic box update checking. If you disable this, then
  # boxes will only be checked for updates when the user runs
  # `vagrant box outdated`. This is not recommended.
  # config.vm.box_check_update = false

  # Create a forwarded port mapping which allows access to a specific port
  # within the machine from a port on the host machine. In the example below,
  # accessing "localhost:8080" will access port 80 on the guest machine.
  # NOTE: This will enable public access to the opened port
  # config.vm.network "forwarded_port", guest: 80, host: 8080

  # Create a forwarded port mapping which allows access to a specific port
  # within the machine from a port on the host machine and only allow access
  # via 127.0.0.1 to disable public access
  # config.vm.network "forwarded_port", guest: 80, host: 8080, host_ip: "127.0.0.1"

  # Create a private network, which allows host-only access to the machine
  # using a specific IP.
  # config.vm.network "private_network", ip: "192.168.33.10"

  # Create a public network, which generally matched to bridged network.
  # Bridged networks make the machine appear as another physical device on
  # your network.
  # config.vm.network "public_network"

  # Share an additional folder to the guest VM. The first argument is
  # the path on the host to the actual folder. The second argument is
  # the path on the guest to mount the folder. And the optional third
  # argument is a set of non-required options.
  # config.vm.synced_folder "../data", "/vagrant_data"

  # Provider-specific configuration so you can fine-tune various
  # backing providers for Vagrant. These expose provider-specific options.
  # Example for VirtualBox:
  #
  # config.vm.provider "virtualbox" do |vb|
  #   # Display the VirtualBox GUI when booting the machine
  #   vb.gui = true
  #
  #   # Customize the amount of memory on the VM:
  #   vb.memory = "1024"
  # end
  #
  # View the documentation for the provider you are using for more
  # information on available options.

  # Enable provisioning with a shell script. Additional provisioners such as
  # Puppet, Chef, Ansible, Salt, and Docker are also available. Please see the
  # documentation for more information about their specific syntax and use.
  # config.vm.provision "shell", inline: <<-SHELL
  #   apt-get update
  #   apt-get install -y apache2
  # SHELL
end
- 启动虚拟机
mutian@mutian-ThinkPad-T440p:~$ cd dev/vagrant/ymu-dev/
mutian@mutian-ThinkPad-T440p:~/dev/vagrant/ymu-dev$ vagrant up
Bringing machine 'default' up with 'virtualbox' provider...
==> default: Checking if box 'centos/7' is up to date...
==> default: Clearing any previously set forwarded ports...
==> default: Clearing any previously set network interfaces...
==> default: Preparing network interfaces based on configuration...
    default: Adapter 1: nat
==> default: Forwarding ports...
    default: 22 (guest) => 2222 (host) (adapter 1)
==> default: Running 'pre-boot' VM customizations...
==> default: Booting VM...
==> default: Waiting for machine to boot. This may take a few minutes...
    default: SSH address: 127.0.0.1:2222
    default: SSH username: vagrant
    default: SSH auth method: private key
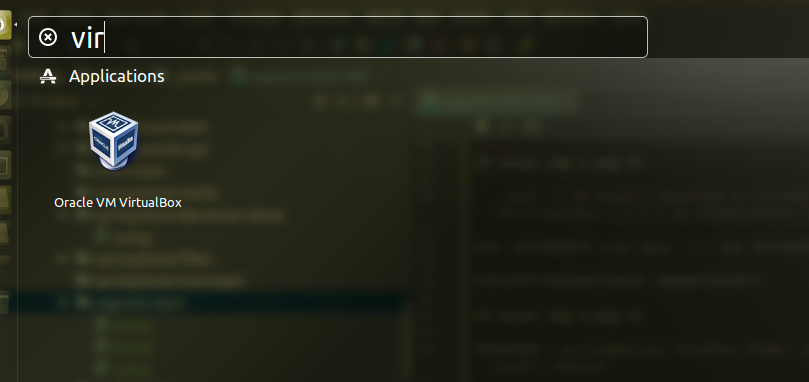
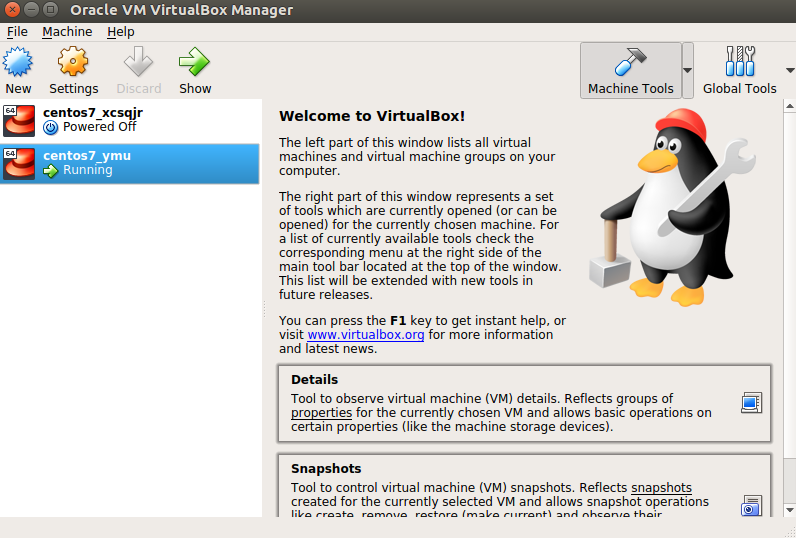
打开virtualbox,可以看到centos7_ymu的虚拟机已经启动。
进入该虚拟机
vagrant sshmutian@mutian-ThinkPad-T440p:~/dev/vagrant/ymu-dev$ vagrant ssh
Last login: Mon Jul 9 07:40:01 2018 from 10.0.2.2
[vagrant@ymu ~]$
下面就可以在里面,类似在真实的服务器操作系统里面一样,安装各种开发软件,配置各种开发环境了。
登出虚拟机
[vagrant@ymu ~]$ logout
Connection to 127.0.0.1 closed.
mutian@mutian-ThinkPad-T440p:~/dev/vagrant/ymu-dev$
停止运行虚拟机
mutian@mutian-ThinkPad-T440p:~/dev/vagrant/ymu-dev$ vagrant halt
==> default: Attempting graceful shutdown of VM...
挂起虚拟机
vagrant shutdown
- 重新加载配置启动
vagrant reload
配置
config.vm.box = "centos/7" #和已经下载的box名字一致
config.vm.hostname = "ymu"
#config.vm.box_version = "1.1.0"
config.vm.box_url = "http://ymu.box"
config.vm.synced_folder "/home/mutian/dev/java/github/ymu-micro-service", "/vagrant", :ext4 => true #共享文件夹
配置共享文件
注:如果不配置共享目录,默认会把Vagrantfile文件所在的目录同步到虚拟机中的、vagrant目录下。
config.vm.synced_folder "/home/mutian/dev/java/github/ymu-micro-service", "/vagrant", :ext4 => true #共享文件夹
第一个路径为宿主电脑文件夹,第二个为同步的虚拟机文件夹。宿主机文件夹中所有内容将实时同步到虚拟机中文件夹下。
注意文件类型。在ubuntu下查询自己系统文件类型执行命令df -lhT。
登录虚拟机,进入/vagrant,将看到:
[vagrant@ymu vagrant]$ ls
logs    ymu-config-repo    ymu-hystrix-dashboard  ymu-server-eureka
target  ymu-config-server  ymu-hystrix-turbine    ymu-service-basic
看到宿舍机相关目录下的内容同步过来了。
所以,这个时候,你就可以只在宿主机编辑代码,在虚拟机里面编译执行了。
配置网络
为自己的box安装各种应用环境
docker安装
设置自启动:systemctl enable docker.service
参考之前blog。
安装nginx
- docker运行方式
- 传统按照方式。
安装redis
- docker运行方式
https://hub.docker.com/_/redis/
- 传统按照方式。
打包分发
1.打包,把上面自己定制的box打包。
命令:
vagrant package --output xxx.boxvagrant package --output xxx.box --base 虚拟机名称
2.分发,把打好的包通过优盘等,给其它人用。
3.更新软件
老用户
新用户
用最新的打包即可。
实时共享文件的问题
通常,默认的,启动虚拟机后或者重新启动虚拟机,会同步Vagrantfile所在目录到虚拟机的目录/vagrant下,但是修改了宿主机的文件,不能实时同步到虚拟机。
下面介绍宿主机通过安装rsync来实时同步宿主机子的文件到虚拟机。
https://www.vagrantup.com/docs/synced-folders/rsync.html
window下安装rsync
通过安装来cygwin安装rsync。
cygwin的网址:https://cygwin.com/install.html。下载安装即可。
安装好后,配置Vagrantfile文件。
具体配置查看:https://www.vagrantup.com/docs/synced-folders/rsync.html
config.vm.synced_folder ".", "/vagrant",type:"rsync"
或
config.vm.synced_folder ".", "/vagrant",type:"rsync",rsync__auto:"true"
启动或者重启vagrant reload,然后执行vagrant rsync-auto.
试试改变宿主机的文件,就实时同步到虚拟机了。只能单向把宿主机的文件同步到虚拟机。
命令说明:
- type:rsync,关键,指定类型。
- rsync__auto:默认是true,如果不配置。如果设置了false,则不实时同步该宿主机目录。
linux系统安装rsync
yun install rsync
win7启动powershell版本过低问题
F:\xrlj.github.com\xrlj-vagrant-dev>vagrant up
The version of powershell currently installed on this host is less than
the required minimum version. Please upgrade the installed version of
powershell to the minimum required version and run the command again.

  Installed version: 2

  Minimum required version: 3
要求powershell版本3以上,所以要升级powershell。
下面是升级powershell到4.0的方法:
下载对应版本。
win7 sp1下载这个:Windows6.1-KB2819745-x64-MultiPkg.msu