maven构建jar上传到nexus私服并拉取
公司内部有很多自己的java lib库等共用代码,为了在公司内部自由共享这些资源,所以需要搭建maven私服。下面介绍利用maven构建java项目为jar包并上传到nexus私服,以及在其它项目中如何引用私服中的jar包。
nexus3的安装
这里不做介绍,参考章节centos7下搭建maven私仓Nexus,或者docker安装各种常用开发应用软件。
新建maven2仓库
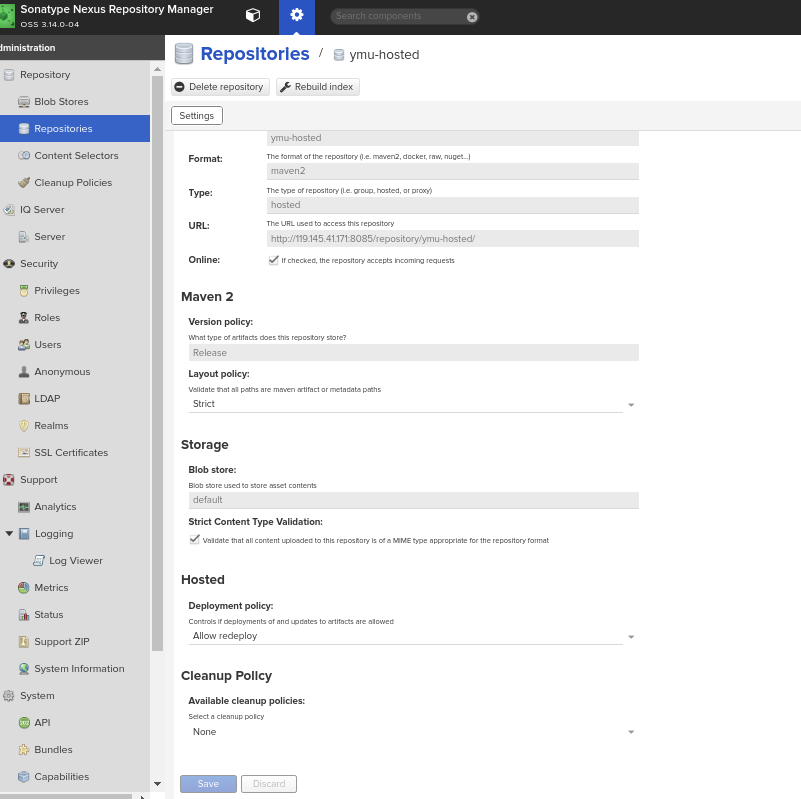
说明:
- 仓库名称:ymu-hosted,类型为hosted。maven仓库有三种类型,hosted、proxy、group。hosted代表私服本机服务器,proxy代理外部仓库服务器,group整合各个hosted和proxy,按顺序策略获取jar。
- 这里选择Version policy为:Release。正式发布版本。正式发布版本都上传到这里来。
- Deployment policy: 选择为Allow Redeploy,可重复发布。代表同一个版本号的jar可以多次发布。这样就不必要设置快照仓库了,项目小改动也作为正式版本发布上去,不必要修改版本号。
maven构建jar并上传到私服相应仓库
配置pom.xml
<!--mavne 发布-->
<distributionManagement>
    <snapshotRepository>
        <id>snapshots</id>
        <name>maven-snapshots</name>
        <url>http://ip:8085/repository/maven-snapshots/</url>
    </snapshotRepository>
    <repository>
        <id>repository</id>
        <name>ymu-hosted</name>
        <url>http://ip:8085/repository/ymu-hosted/</url>
    </repository>
</distributionManagement>
说明:
- snapshotRepository:指定jar包要发布的快照仓库。版本号这样
0.0.1-SNAPSHOT,代表的是快照版本,后缀的SNAPSHOT必须是大写,不能是小写。 - repository:指定jar包发布上去的正式版本仓库。当版本号是这样
<version>0.0.2</version>,没有SNAPSHOT的时候,jar将发布到这里指定的私服仓库ymu-hosted下。 - id:对应maven配置setting.xml中的配置。保持id一致。远程仓库的唯一标志,很重要。
- name:只是方便阅读,随意定义。
- url:仓库地址。登录nexus,在配置中可以查看。
配置setting.xml
<server>
  <id>repository</id>
  <username>admin</username>
  <password>admin123</password>
</server>

<server>
  <id>snapshots</id>
  <username>admin</username>
  <password>admin123</password>
</server>
配置完成后,执行mvn deploy命令,就可以发布jar到私服了。修改版本号,可以实际验证查看发布到哪个仓库下。
从nexus私服下载构件
配置pom.xml:
<repositories>
    <!--自己私仓,下载jar-->
    <repository>
        <id>ymu-public</id>
        <name>ymu nexus</name>
        <url>http://119.145.41.171:8085/repository/maven-public/</url>
        <snapshots>
            <enabled>true</enabled>
        </snapshots>
        <releases>
            <enabled>true</enabled>
        </releases>
    </repository>


</repositories>

<pluginRepositories>
    <!--私服,插件-->
    <pluginRepository>
        <id>ymu-public</id>
        <name>ymu nexus</name>
        <url>http://119.145.41.171:8085/repository/maven-public/</url>
        <snapshots>
            <enabled>true</enabled>
        </snapshots>
    </pluginRepository>

</pluginRepositories>
看上面配置,我们配置自己的私服用的是maven-public仓库,该仓库是group类型,整合了自己的私仓等,如下图:
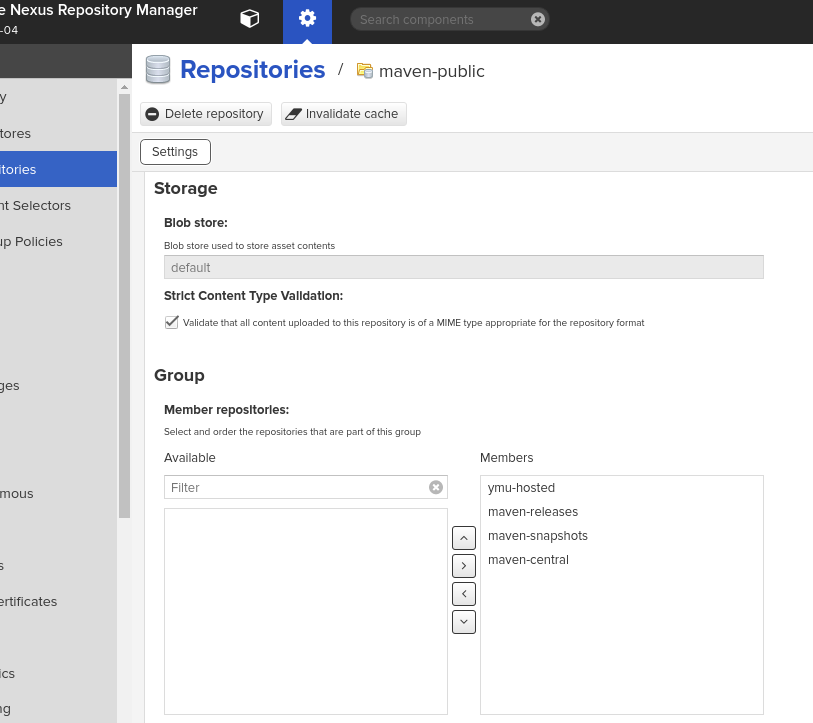
看Group组,我们可以看到Member里面有很多个仓库,这代表,拉取jar构件的时候,首先从私服本机拉取,拉取不到的话再从下一个拉取,按顺序处理。从maven中央仓库拉取的jar构件都会缓存到其它仓库。
以上,我们看到的配置在pom.xml中,只针对某个项目有效。如果是多个项目想都通用私服,则可以在maven的setting.xml中配置:
<settings>
  <mirrors>
    <mirror>
      <!--This sends everything else to /public -->
      <id>nexus</id>
      <mirrorOf>*</mirrorOf>
      <url>http://localhost:8081/repository/maven-public/</url>
    </mirror>
  </mirrors>
  <profiles>
    <profile>
      <id>nexus</id>
      <!--Enable snapshots for the built in central repo to direct -->
      <!--all requests to nexus via the mirror -->
      <repositories>
        <repository>
          <id>central</id>
          <url>http://central</url>
          <releases><enabled>true</enabled></releases>
          <snapshots><enabled>true</enabled></snapshots>
        </repository>
      </repositories>
     <pluginRepositories>
        <pluginRepository>
          <id>central</id>
          <url>http://central</url>
          <releases><enabled>true</enabled></releases>
          <snapshots><enabled>true</enabled></snapshots>
        </pluginRepository>
      </pluginRepositories>
    </profile>
  </profiles>
  <activeProfiles>
    <!--make the profile active all the time -->
    <activeProfile>nexus</activeProfile>
  </activeProfiles>
</settings>
这样子就可以全局引用了,所有项目都是从配置的私服以及其它第三方私服下载构件。不用在每个项目的pom.xml中配置了。
第三方的私服,可以添加proxy私仓,然后整合进去group里面。
上传第三个jar包到nexus私服中
方法一:在nexus3界面直接操作
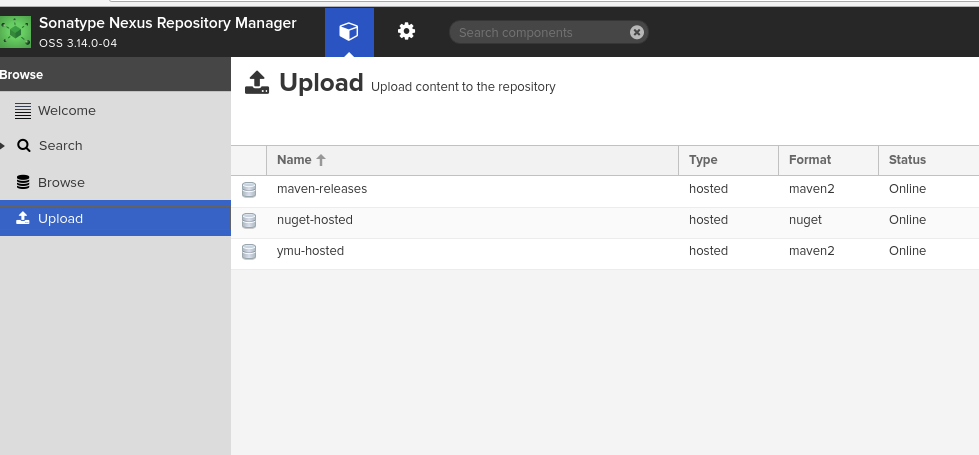
如上图,点击maven-releases仓库,进入下面图:
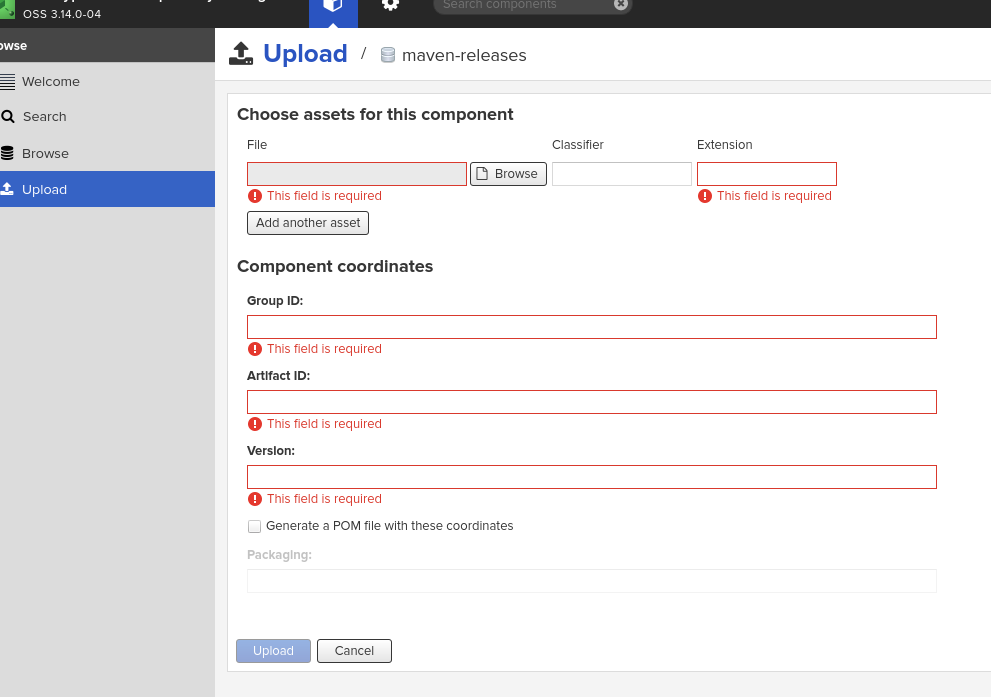
按照输入要求,下面我们上传一个第三方的jar包:
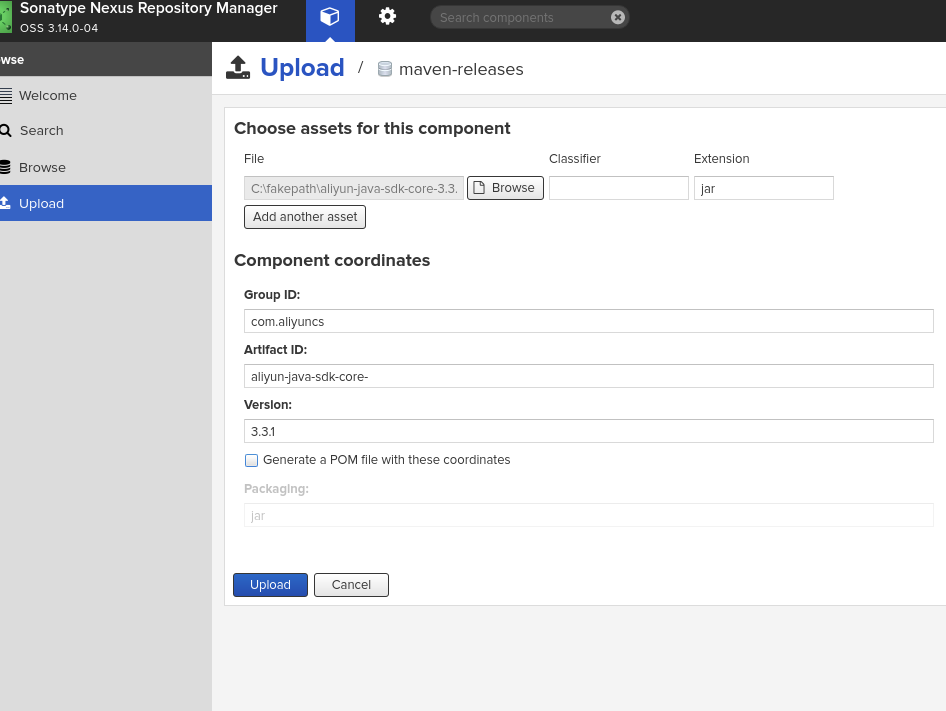
最好选定下生成pom.xml,否则在其它项目引用的时候,无法点击跳进去。但是对jar使用没影响。
可以打开对应仓库浏览已上传的jar构件:
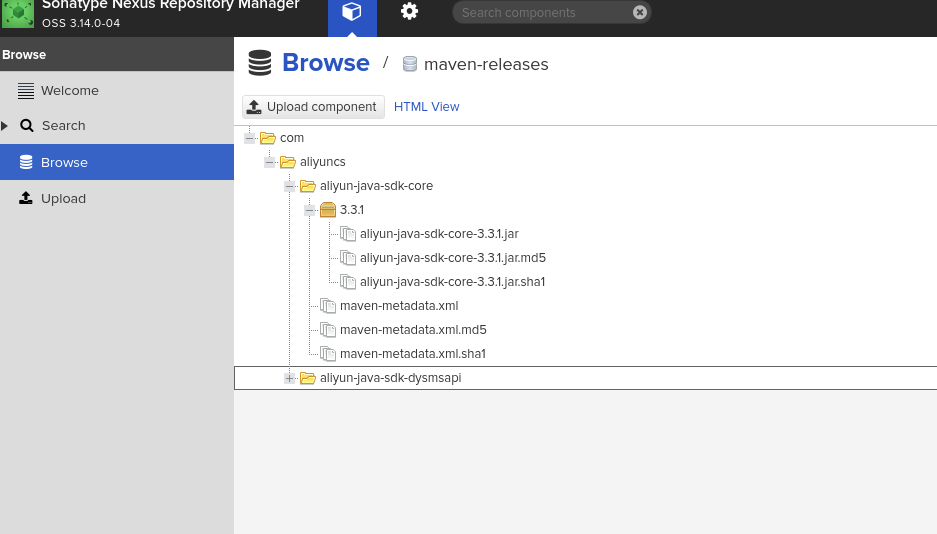
下面就可以在pom.xml中正常的引用了。
方法二:mvn命令直接操作
mvn deploy:deploy-file -DgroupId=com.csource -DartifactId=fastdfs-client-java -Dversion=1.27-RELEASE -Dpackaging=jar -Dfile=/home/mutian/Desktop/fastdfs-client-java-1.27-RELEASE.jar -Durl=http://119.145.41.171:8085/repository/ymu-hosted/ -DrepositoryId=repository
参数说明:
- -Durl: 仓库地址,jar包要上传到这个自己设定的本机仓库下面。
- -DrepositoryId:重要,这个是在maven配置文件setting.xml中设定的。对应该仓库的访问id。名字要一致。
- -DgroupId=com.csource -DartifactId=fastdfs-client-java -Dversion=1.27-RELEASE 这三个参数根据你的jar包随便设。
- -Dfile:要上传的jar包所在路径。